Flutter Hooks state management

So today we are having a look at a state management approach that is just a step above Stateful widgets. This is in fact a very good and easy to grasp method for those coming from the web (react.js) and those who want to engulf themselves in a functional simplistic approach to state management.
There are also other state management related article on over side, check it put here.
Flutter hooks is a community package and so needs to be added to our project as a dependency. You can check it out here to add to your pubspec.yaml file
With stateful widgets, we saw that we needed two classes, one for the widget and the other for the state. We needed to define the mutable properties of the widget in the state class and then use setState to mutate them and trigger a rebuild.
What if we could have all those hassles handled for us while being encapsulated?
Wow, the code is simplistic and straight to the point.
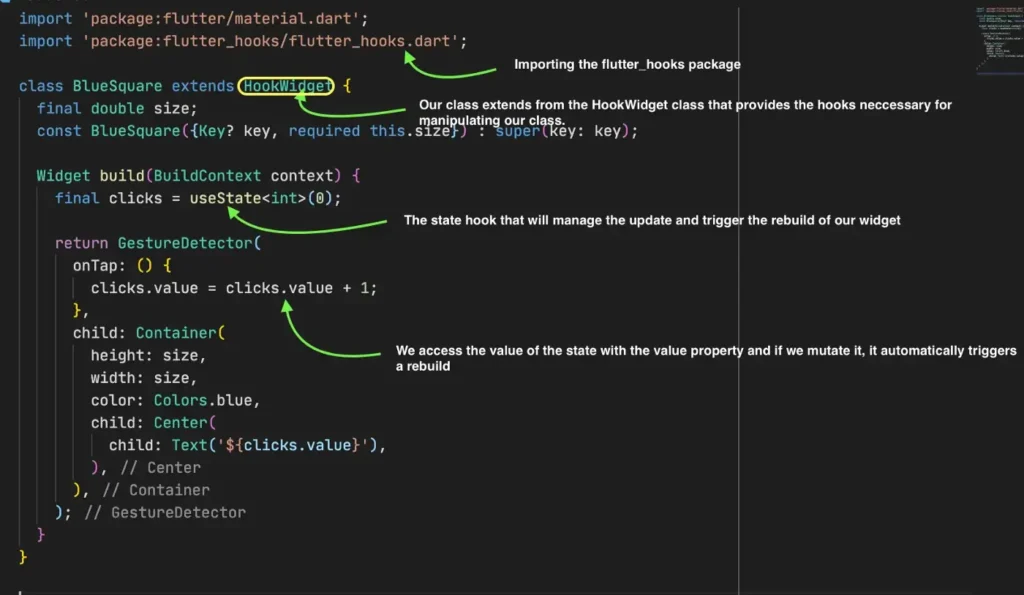
We have our widget class look like any other stateless widget but for the fact that it extends the HookWidget class, this class gives us access to all the hooks needed to make our project come to life and in our case, we are using the useState hook. The useState is a valueNotifier that creates valueNotifier.value and subscribes to it such that whenever that value is updated, it marks the HookWidget as needing rebuild and so the build method is called (hence why we use clicks.value to access and update the value for our state).
From our new modified BlueSquare we can see how adding and using flutter hooks has reduced the amount of code we have written and removed the control of being accountable for our rebuilds to be handled by the value notifier.
But this is just a minimal look at the reduction of the boilerplate code that hooks provide as an advantage.
When we looked at stateful widgets, we saw that there were lifecycle methods like the initState, dispose and didChangeDependencies that were used to prepare code or values that the build function will depend on; things like listeners, controllers etc, hooks take away the boiler plate code that we need to be doing this, another thing is that most at times these listeners and controllers can’t be reused which means if we need more than one controller even of the same type, we will need to go through the same initialization and disposing of the controllers ourselves and this can be hassle and our code becomes cumbersome for no reason.
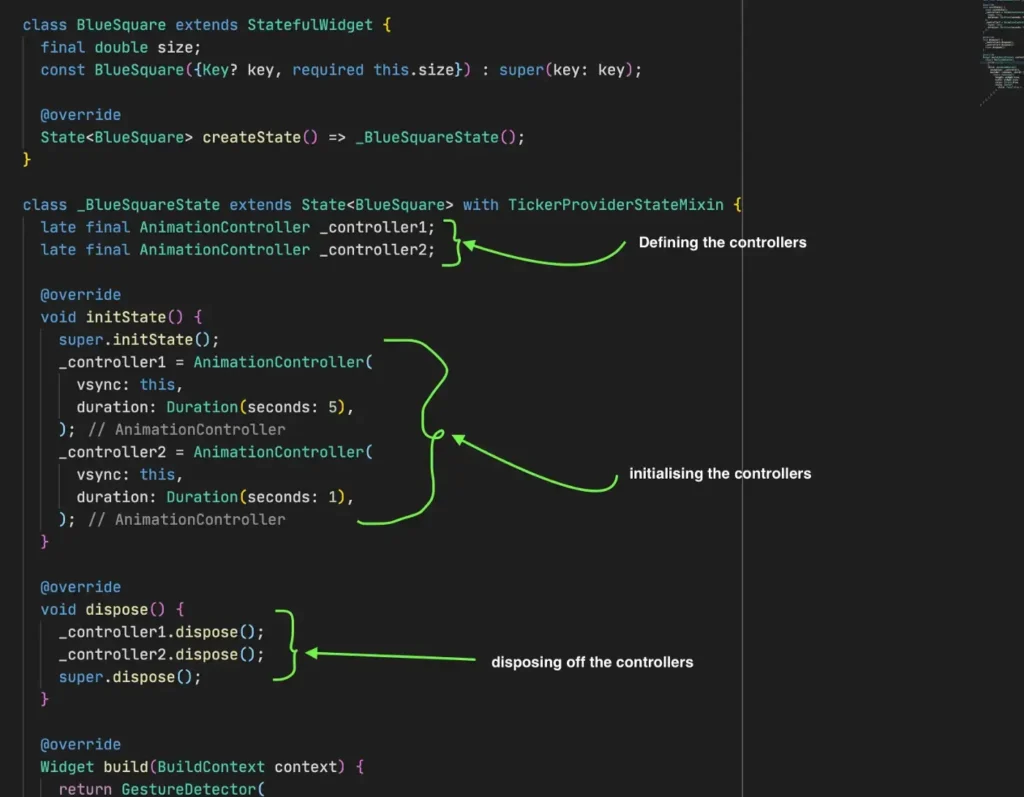
With just two controllers we are starting to see how cumbersome the code can be and if we are to add just one more controller, we will need to go through all the hassle again, defining, initializing and deposing. If we contrast this with the code that does the same thing with hooks, we see a big difference in the amount of code.
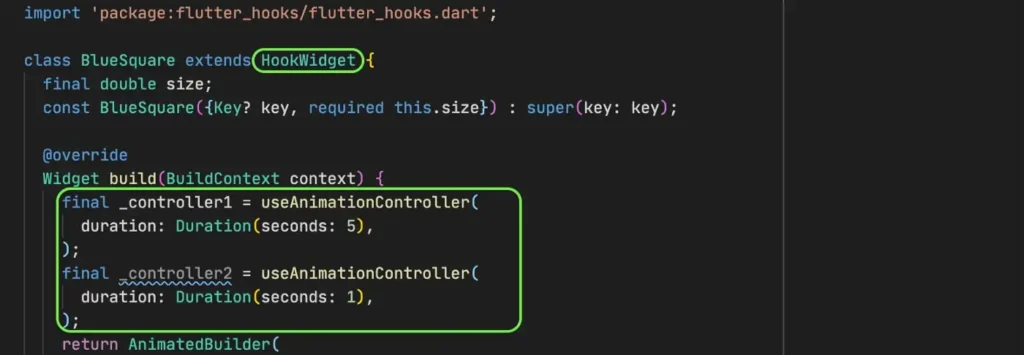
And with just this small amount of code, we are able to achieve the same fit of work. The useAnimationController creates an AnimationController that is already disposed of and initializes it with the values provided.
Let’s modify our BlueSquare to scale down to 80% of its size every time it is clicked both hooks and stateful widget approaches. This example makes use of the useState and the useAnimationController we have seen before.
With hooks
import 'package:flutter/material.dart';
import 'package:flutter_hooks/flutter_hooks.dart';

class BlueSquare extends HookWidget {
  final double size;
  const BlueSquare({Key? key, required this.size}) : super(key: key);

  @override
  Widget build(BuildContext context) {
    final clicks = useState(0);
    final scale = useState(1.0);

    final _controller1 = useAnimationController(
      duration: Duration(seconds: 1),
      lowerBound: 0.8,
      upperBound: 1.0,
    );

    _controller1.addListener(() {
      scale.value = _controller1.value;
    });

    return AnimatedBuilder(
      animation: _controller1,
      builder: (context, child) {
        return Transform.scale(
          scale: scale.value,
          child: child,
        );
      },
      child: GestureDetector(
        onTap: () {
          clicks.value++;
          _controller1.reverse(from: 1.0);
        },
        child: Container(
          height: size,
          width: size,
          color: Colors.blue,
          child: Center(
            child: Text('${clicks.value}'),
          ),
        ),
      ),
    );
  }
}
With Stateful Widgets
import 'package:flutter/material.dart';

class BlueSquare extends StatefulWidget {
  final double size;
  const BlueSquare({Key? key, required this.size}) : super(key: key);

  @override
  State<StatefulWidget> createState() => _BlueSquareState();
}

class _BlueSquareState extends State<BlueSquare> with TickerProviderStateMixin {
  int clicks = 0;
  double scale = 1.0;

  late final AnimationController _controller1;

  @override
  void initState() {
    super.initState();

    _controller1 = AnimationController(
      vsync: this,
      duration: Duration(seconds: 1),
      lowerBound: 0.8,
      upperBound: 1.0,
    );

    _controller1.addListener(() {
      setState(() {
        scale = _controller1.value;
      });
    });
  }

  @override
  void dispose() {
    _controller1.dispose();
    super.dispose();
  }

  @override
  Widget build(BuildContext context) {
    return AnimatedBuilder(
      animation: _controller1,
      builder: (context, child) {
        return Transform.scale(
          scale: scale,
          child: child,
        );
      },
      child: GestureDetector(
        onTap: () {
          setState(() {
            clicks++;
          });

          _controller1.reverse(from: 1.0);
        },
        child: Container(
          height: widget.size,
          width: widget.size,
          color: Colors.blue,
          child: Center(
            child: Text('$clicks'),
          ),
        ),
      ),
    );
  }
}
We have seen just an example of two hooks, useState and useAnimationController, but there are quite a few other hooks provided from the flutter_hooks package some like:
- useEffect(): which alongside the useState is used to initialize state data and most often could be used to replicate the function of initState and dispose.
- useContext(): It returns the BuildContext of the HookWidget.
- useTextEditingController(): Creates a TextEditingController and automatically takes care of disposing of it.
- useTabController(): Creates a TabController and automatically takes care of disposing of it.
- useStream<T>(): Subscribes to a Stream<T> and uses an AsyncSnapshot<T> to return the current state.
- useFuture<T>(): Subscribes to a Future<T> and uses an AsyncSnapshot<T> to return the current state.
And many others, you can check out the documentation for more on that.
If you however check out the documentation and don’t find a hook that suits your purpose, you can create a custom hook for yourself and use it like any other hook.
So let’s say for instance that we needed our blue square to instead show some random numbers within the range of 0–9 every second, we could just create a hook for it.
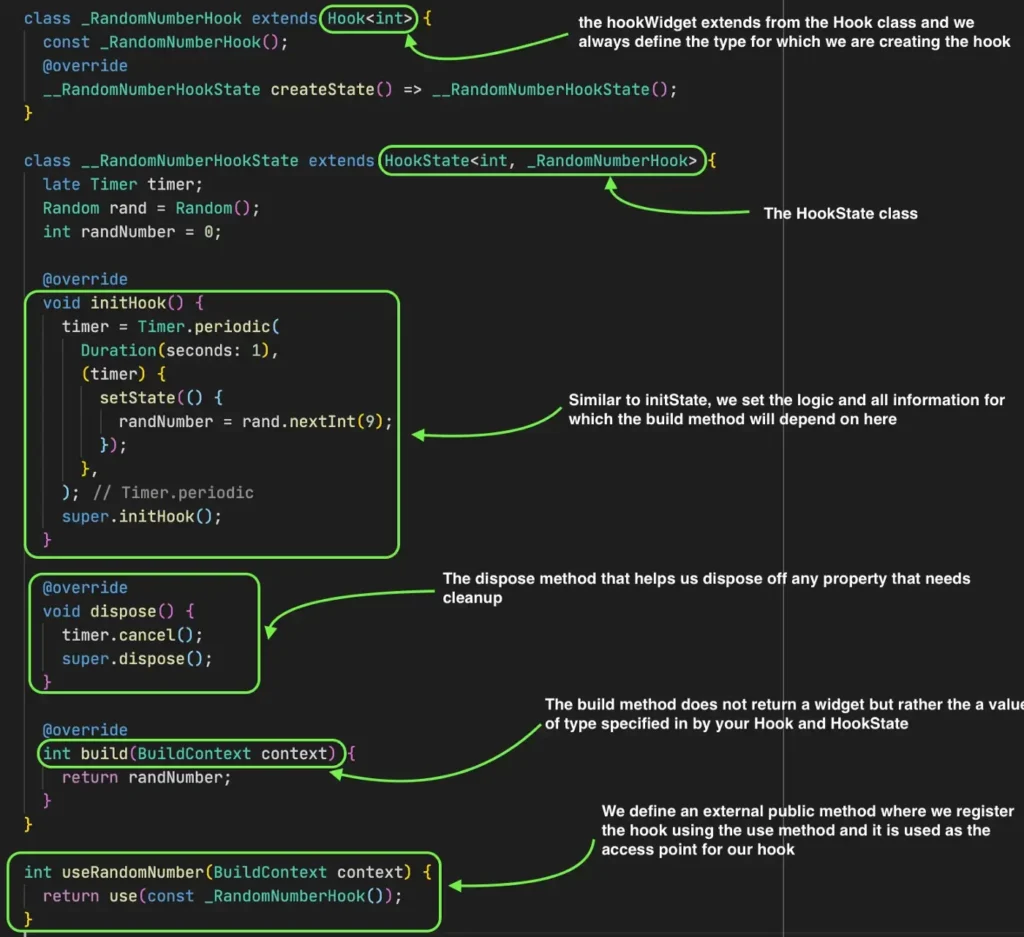
And with that we have created our own custom hook ready for use on our project. Now let’s use it with the useRandomNumber() function.
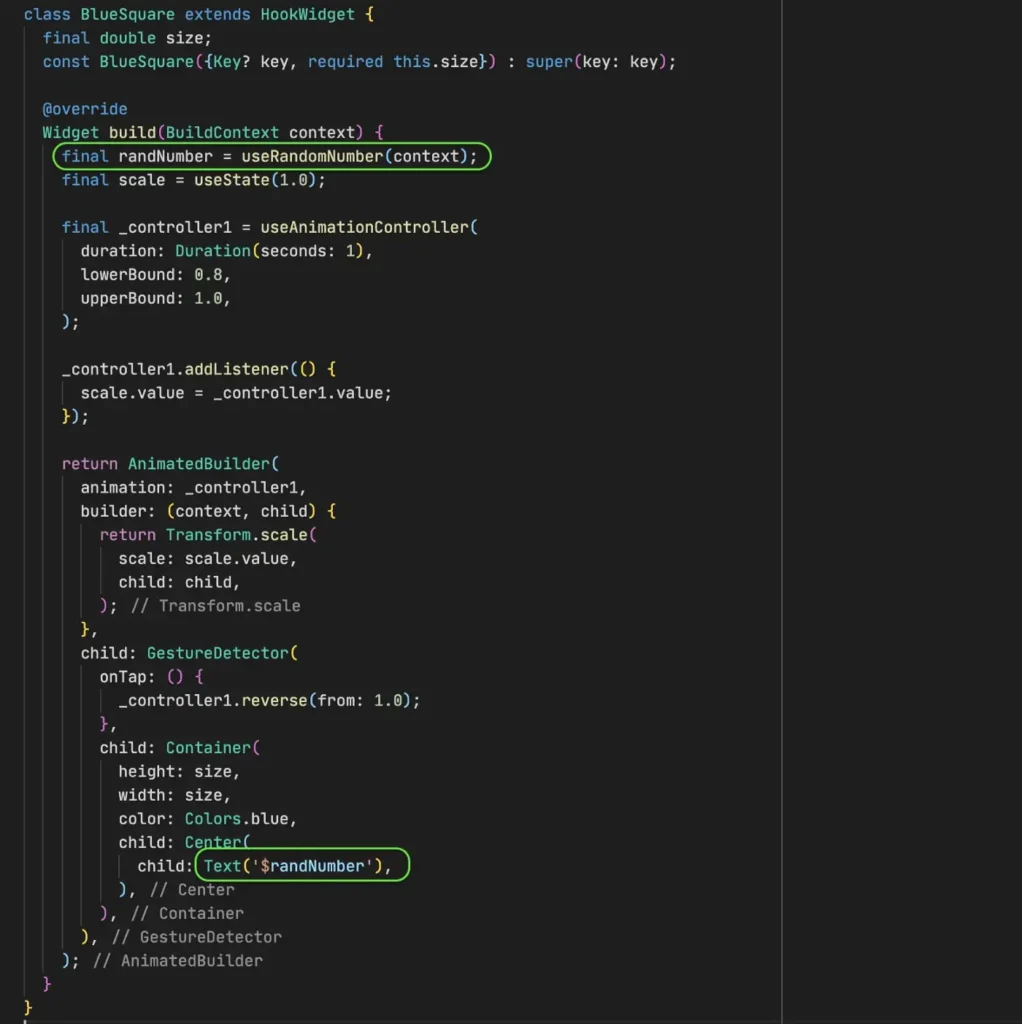
And that’s how we can use our custom hook. The fortunate thing is that such a hook can be reused even in other classes and will save us a lot of effort.
Hooks give us the means:
- Reduce redundant and cumbersome boilerplate code such as that in a stateful widget
- Improve on our code usability as we can create and reuse hooks without any issues.